
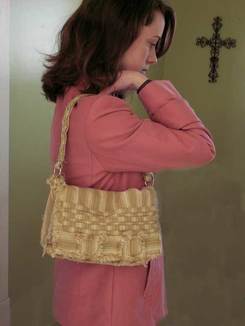
Homespun Kitchen Towel Purse!
This homespun purse has been created entirely with 2 homespun dish towels and some notions! I had a great time designing this purse and it's one of my favorites. Just make sure that you are purchasing HOMESPUN kitchen towels so that you will get a good frayed, ragged result. See photos and instructions below.
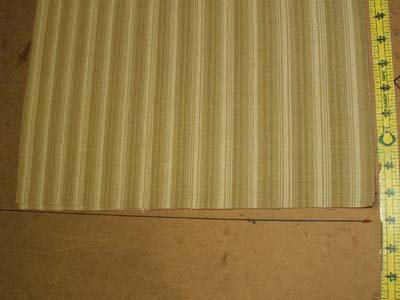
Homespun kitchen towels may be found at many gift/antique shops. Occasionally we have homespun towel inventory at Jubilee Fabric.
Homespun kitchen towels may be found at many gift/antique shops. Occasionally we have homespun towel inventory at Jubilee Fabric.
|
|
Materials:
*Homespun kitchen towels may be found at many gift or antique shops or may be purchased at Jubilee Fabric. The towels must be homespun to fray properly.*
- 2 - homespun kitchen towels*
- 1 yard cotton or polypropylene webbing or belting
- 2 - 1 inch "D rings"
- 1 piece of stiff plastic, 9.5" x 2" (I use cheap plastic placemats found at dollar stores or Walmart)
*Homespun kitchen towels may be found at many gift or antique shops or may be purchased at Jubilee Fabric. The towels must be homespun to fray properly.*
1. Use a small tight stitch length for all ragged projects and always remember to do any backstitching (to secure the seams) 5/8" from the edges. That last 5/8" will become "fray" and will not hold stitching.
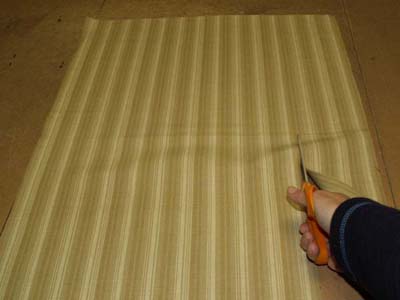
2. Machine wash and dry your 2 homespun towels. Iron flat.
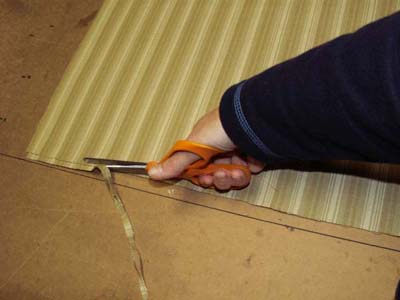
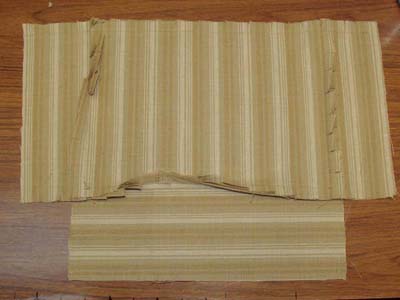
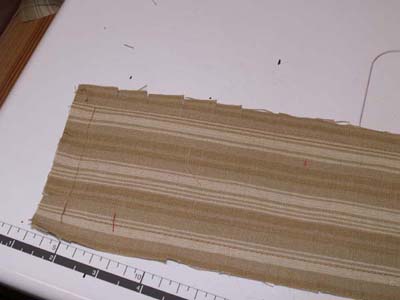
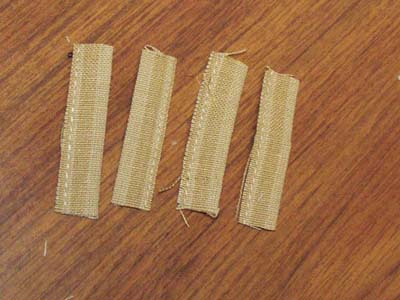
3. Trim the hemmed edges off, cutting very close to the fold and set aside. Do not cut into the folded hem because you will use these later in the project.
2. Machine wash and dry your 2 homespun towels. Iron flat.
3. Trim the hemmed edges off, cutting very close to the fold and set aside. Do not cut into the folded hem because you will use these later in the project.

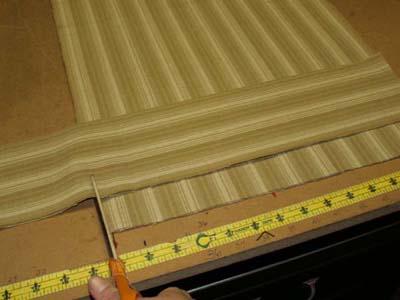
4. Trim the bottom edge of each towel to be "square" with the side. The best way to do this is to use a squares table or something with a squared right angle as plumb lines. Line up the sides straight with the side plumb line. Then trim the bottom edge to be straight with the bottom plumb line. There may be other ways of doing this but it is necessary because not all towels are manufactured perfectly straight and square. It's not necessary, however, to get this perfect. Just make a decent attempt to square it.
|
|
5. Place one towel on top of the other to make two layers. Cut the following pieces from both layers. Remember that you will actually have double the amounts shown since you are cutting from two layers.
1- Back panel- 11.5" wide by 15.5" high.
1- Front panel - 11.5" wide by 8" high.
2- Side panels 3.5" wide by 8" high.
1- Bottom panel 3.5" wide by 11.5" high.
1- Bottom casing 3" wide by 10.5" high.
1- Back panel- 11.5" wide by 15.5" high.
1- Front panel - 11.5" wide by 8" high.
2- Side panels 3.5" wide by 8" high.
1- Bottom panel 3.5" wide by 11.5" high.
1- Bottom casing 3" wide by 10.5" high.
|
|
6. Throughout these instructions, all purse pieces that you just cut should remain double layered. This will give the purse extra body. For example, when the instructions call for the front panel, you should assume that it is BOTH front panels, one layered on top of the other, just like they were cut.
7. Stitch the two side panels to the sides of the front panel. One on either side. Stitch the bottom panel to the bottom of the front panel. Begin stitching about 5/8" from the edge and finish/backstitch about 5/8" from the other end.
8. Top stitch the top edge with a seam 5/8" from the edge. Clip the seam allowances and the top edge with clips that are approximately 1/2" deep and 1/2" apart. Be very careful not to clip into the stitching.
9. Stitch the bottom of each of the side panels to the bottom panel. Clip the seam allowance.
10. If you have left over fabric, you can make some pockets, whatever size you wish and stitch to the lower portion of the back side. Make sure they are placed no more than 7" from the bottom. Clip any exposed seam allowances on the pocket. I like to make the top seam a fold but it can be a clipped (frayed) seam also if you wish.
10. If you have left over fabric, you can make some pockets, whatever size you wish and stitch to the lower portion of the back side. Make sure they are placed no more than 7" from the bottom. Clip any exposed seam allowances on the pocket. I like to make the top seam a fold but it can be a clipped (frayed) seam also if you wish.
11. Top stitch the sides and top edge of the back panel about 5/8" from the edge.
12. Pin the top of the side panels to the back panel 8" from the bottom of the back panel. Stitch the side panels and the bottom panel to the lower portion of the back panel clipping the seams and easing as necessary as you go around the corners.
13. If you want a Velcro closure, stitch one side of the Velcro to the top inside of the back panel. Velcro is optional.
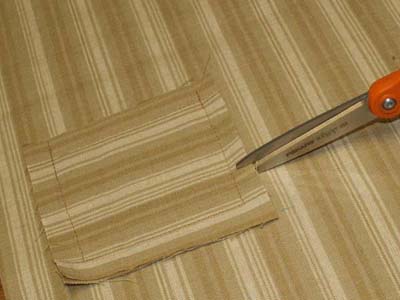
14. Stitch 1/2" around three sides of the casing piece. Insert the plastic piece. Stitch the remaining side, enclosing the plastic inside. Clip the seam allowances.
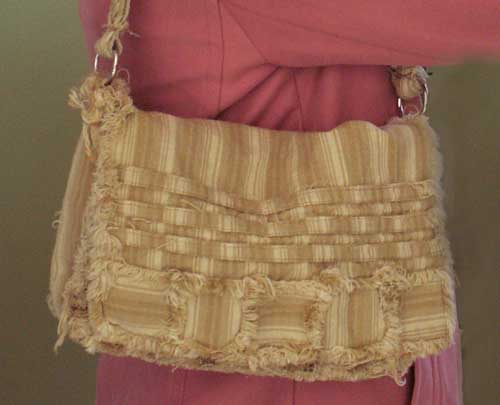
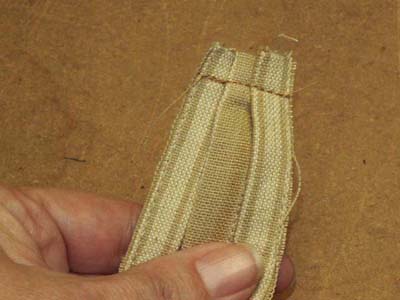
15. Select the three longest pieces of trimmed hem that you saved earlier. Stitch those three together at one end and braid the remaining length. This will be your strap length. Stitch the end of the braid to secure. Pin the braid onto the webbing and trim the ends of the webbing to fit. Stitch over the top of the braid along both sides to secure the braid to the webbing

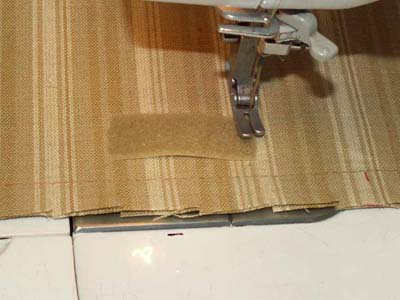
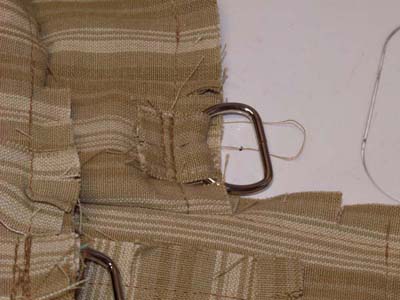
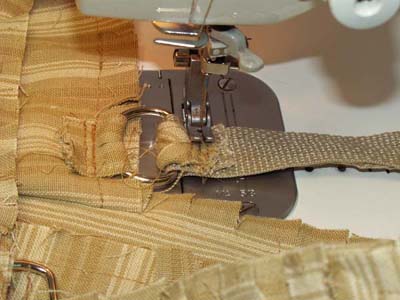
16. Cut four pieces of the hem that you trimmed initially to 2" long. Loop two of these through one of the D-rings and stitch them onto the inside top of the side panels, securing the D-ring with the straight side up. Repeat with two more hem pieces on the other side panel.
|
|
17. Loop each end of the webbing strap into the D-rings and stitch securely. I like to stitch this several times for security. Make sure the braid is facing out and be sure the strap is not twisted.
18. Use the remaining hem pieces to embellish the front of the purse. For this purse, I stitched three parallel rows of hem onto the outside back panel, about 1" apart. Leave the ends unfinished, they will fray. I also pieced together five squares made from the leftover fabric. Each square was 3.25" x 3.25". Then I stitched this row of squares below the rows of hem. See photo below. You can use these ideas or come up with your own ideas for embellishing the front side of the back panel.
19. Clip any remaining seam allowances. Machine wash/dry the purse and the bottom insert using a liquid fabric softener (optional) and detergent. 1/2 c. table salt added to the wash will help prevent color bleeding.
20. When dry, remove loose strings by shaking (preferably outside!) and using a lint roller. If you used velcro for a closure, you should mark the right spot for the other side of the velcro on the front panel and attach it now.
21. Place the bottom insert into the purse (this may be glued with hot glue if desired) and you are ready to go!
